
Free VPN Server: Build Your Own With CacheGuard
Every month, millions of people pay for VPN subscriptions — NordVPN, ExpressVPN, Surfshark and others — when a free VPN server built on their own hardware would do the job better. They pay between €5 and €15 per month for a service that routes their traffic through someone else’s servers, with no guarantee about what happens to their data.
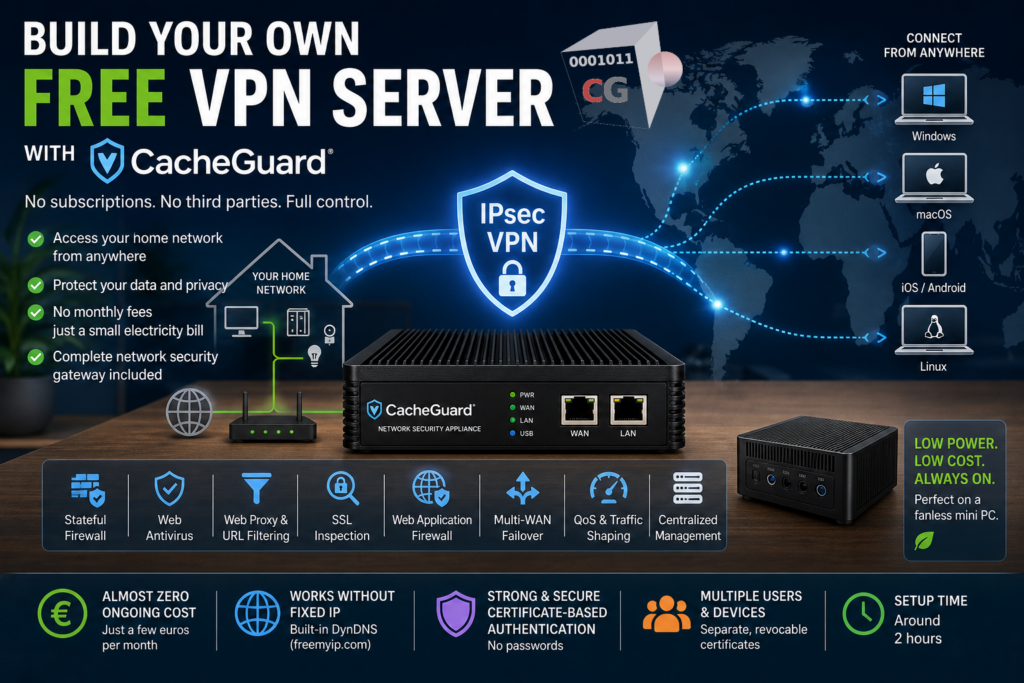
There is a better option. You can build your own free VPN server at home using CacheGuard — a free, open-source network security appliance that turns any old PC or virtual machine into a full IPsec VPN server. No subscription, no monthly fees. Just a small electricity bill that a low power fanless mini PC keeps to an absolute minimum.
This article focuses on the cost savings angle — stopping subscription fees and accessing your home network from anywhere. If you are more interested in the privacy, data sovereignty and technical control aspects of running your own VPN, read our dedicated article on self hosted VPN servers.
Why Build Your Own Free VPN Server?
Before diving into the how, it is worth understanding the main reasons people choose to build their own free VPN server rather than paying for a commercial subscription.
Almost Zero Ongoing Cost
Commercial VPN services cost between €5 and €15 per month — that is up to €180 per year, every year, indefinitely. A self-hosted VPN server runs on hardware you already own and the only ongoing cost is the electricity consumed by the machine hosting it. Choosing a low power consumption machine — such as a fanless mini PC — makes a lot of sense for a dedicated always-on VPN server. The electricity cost of a low power mini PC is typically a few euros per month at most, still a fraction of any commercial VPN subscription.
Access Your Home Network From Anywhere
This is the most compelling advantage that commercial VPN services simply cannot offer. A commercial VPN connects you to their network. Your own free VPN server connects you back to your home network — giving you access to your home devices, your local files, your home server, your NAS, your smart home — securely from anywhere in the world. Whether you are travelling, working from a coffee shop or connecting from a hotel, your home network is always a VPN connection away.
No Data Caps or Speed Throttling
Commercial VPN providers sometimes throttle speeds or impose data limits on their lower-tier plans. Your own VPN server runs at the full speed of your home internet connection with no artificial restrictions.
Stop Paying for a Service You Do Not Fully Control
With a commercial VPN you are paying for a service managed by a company you do not know, running infrastructure you cannot inspect, under a privacy policy you cannot verify. Building your own free VPN server means the software is free, the hardware is yours and there is no recurring bill landing in your inbox every month.
Note: If your primary motivation is privacy, data sovereignty and full technical control over your VPN infrastructure rather than cost savings, read our dedicated article on self hosted VPN servers which covers those topics in depth.
What Is CacheGuard and Why Use It as a Free VPN Server?
CacheGuard is a free, open-source network security appliance that has been in development since 2002. It is not an application you install on top of an existing operating system — it IS the operating system. A fully custom, network appliance oriented Linux distribution built from scratch and designed specifically for network security.
CacheGuard actually comes in two flavors installed from the same ISO: CacheGuard Gateway — the security appliance we focus on in this article — and CacheGuard Manager, a dedicated appliance that allows you to centrally manage multiple CacheGuard Gateways from a single dashboard. Throughout this article, when we refer to CacheGuard we mean CacheGuard Gateway.
CacheGuard includes a full IPsec VPN server built in — no plugins, no additional software, no extra configuration. But it also includes a complete security stack that commercial VPN services do not offer:
- Stateful firewall protecting your entire home network
- Web antivirus scanning traffic at the gateway level
- Filtering web proxy with URL filtering capabilities
- SSL inspection to detect threats in encrypted traffic
- Web Application Firewall for your web applications
- Reverse proxy and load balancer
- Multi-WAN support with failover
- QoS and traffic shaping
- Centralized management of multiple CacheGuard gateways via CacheGuard Manager
When you use CacheGuard as your free VPN server, you are not just getting a VPN — you are getting a complete network security gateway that happens to include a VPN server.
What You Need to Build Your Free VPN Server
Building your own free VPN server with CacheGuard requires very little:
Hardware:
- Any x86 PC or laptop with at least 2 network interfaces — an old unused machine works perfectly
- Minimum: 512 MB RAM, 20 GB disk, 2 CPU cores
- Recommended: 4 GB RAM, 60 GB disk, 4 CPU cores
- A second network interface card can be added for around €10 if your machine only has one
Software:
- CacheGuard-OS — free to download at cacheguard.com
- A USB stick or CD-ROM to create the installation media
Network:
- Access to your home router to configure port forwarding
- UDP ports 500 and 4500 must be forwarded to your CacheGuard appliance for IPsec VPN traffic
Time:
- The full installation and configuration takes around 2 hours
No Fixed IP? No Problem
One of the most common concerns about running a free VPN server at home is not having a fixed public IP address. Most home internet connections use a dynamic IP that changes periodically — which would normally make it impossible to connect to your VPN server reliably.
CacheGuard solves this with built-in DynDNS support. DynDNS — Dynamic DNS — automatically updates a hostname to point to your current public IP address, even when it changes. CacheGuard integrates with free DynDNS services like freemyip.com, so you always connect to your VPN using a stable hostname like sweethome.freemyip.com regardless of what your public IP is at any given moment.
This makes running a free VPN server at home fully practical even without a fixed IP address from your ISP.
How Your Free VPN Server Works
Once CacheGuard is installed and configured, here is how the VPN works in practice:
Certificate-based authentication. CacheGuard uses IPsec with certificate-based authentication — a strong, password-free method where each device has its own unique certificate. This is significantly more secure than username and password authentication.
Ready-to-use client profiles. CacheGuard automatically generates client configuration profiles for every major platform — iOS, macOS, Android, Windows and Linux. You download the profile, import it on your device, and connect. No manual configuration required on the client side.
Full tunnel or split tunnel. You can configure your VPN to route all your internet traffic through your home network — protecting you completely on public Wi-Fi — or to only route traffic destined for your home network while leaving other traffic on the local connection.
Multiple simultaneous users. You can generate separate certificates for multiple family members or devices — each with their own unique, revocable certificate.
Free VPN Server Setup: A High Level Overview
Here is the high level flow for setting up your free VPN server with CacheGuard:
- Download the CacheGuard-OS ISO from cacheguard.com
- Install CacheGuard-OS on your machine — it formats the disk and installs itself as the operating system
- Design your network — connect CacheGuard between your ISP router and your internal network
- Configure port forwarding on your ISP router — UDP 500 and 4500 to your CacheGuard appliance
- Set up DynDNS — create a free hostname at freemyip.com and configure it in CacheGuard
- Generate certificates — create a root CA, a VPN server certificate and client certificates for each device
- Enable the VPN server — activate IPsec VPN in CacheGuard’s function modes
- Apply configuration — commit all changes through the web interface
- Generate client profiles — download the ready-to-use configuration file for each device
- Connect — import the profile on your device and activate the VPN
For the complete step-by-step technical guide with screenshots of every screen, refer to our detailed tutorial: How to Build Your Own VPN Server at Home with CacheGuard
Want an Even Easier Setup? Meet BeVyPN
If the certificate configuration steps feel complex, CacheGuard offers an embedded application called BeVyPN that automates most of the VPN setup process — certificate generation, VPN configuration and client provisioning — significantly reducing the manual effort.
BeVyPN is a paid option available for organizations and individuals who want to get their VPN server up and running as quickly as possible without going through each configuration step manually.
Learn more at cacheguard.com/bevy-of-vpn and bevypn.com.
Free VPN Server vs Commercial VPN: A Quick Comparison
| Commercial VPN | CacheGuard Free VPN Server | |
|---|---|---|
| Monthly cost | 🔴 €5 to €15 | 🟢 Electricity only (a few € on a mini PC) |
| Annual cost | 🔴 €60 to €180 | 🟢 ~€20 to €50 electricity |
| Access your home network | 🔴 No | 🟢 Yes |
| Speed throttling | 🟠 Sometimes | 🟢 No |
| Data caps | 🟠 Sometimes | 🟢 No |
| Firewall included | 🔴 No | Yes |
| Web antivirus included | 🔴 No | Yes |
| Works without fixed IP | 🟢 Yes | 🟢 Yes (DynDNS) |
| Setup time | 🟢 5 minutes | 🟠 ~2 hours |
| Technical knowledge required | 🟢 None | 🟠 Basic networking |
| Ongoing subscription | 🔴 Yes — forever | 🟢 No |
| Real IP exposure | 🟢 No | 🟠 Yes if at home but effectively protected 🟢 No if hosted in a data center |
Is a Free VPN Server Right for You?
A free VPN server built with CacheGuard is the right choice if:
- You want to stop paying monthly VPN subscription fees
- You want to access your home network, files and devices securely from anywhere
- You have a spare PC or are willing to buy a small mini PC
- You have basic networking knowledge or are willing to learn
- You want a complete network security gateway not just a VPN
It may not be the right choice if:
- You need to appear to be in a specific country for streaming services — your home IP is fixed geographically
- You travel constantly and need a VPN that works in countries that block IPsec — commercial VPNs have more options for bypassing restrictions
- You have no spare hardware and are not ready to invest in a dedicated machine
If your priority is privacy, data sovereignty and full control over your VPN infrastructure rather than cost savings, read our dedicated article on self hosted VPN servers — it covers deployment options, certificate architecture, jurisdiction choices and everything else that matters from a privacy perspective.
Conclusion
Paying for a commercial VPN subscription means recurring monthly fees, speed throttling and no access to your own home network — every month, indefinitely. Building your own free VPN server with CacheGuard eliminates the subscription, gives you access to your home network from anywhere in the world, and delivers a complete network security gateway at the same time.
It takes about 2 hours to set up. It runs on hardware you already own or on an affordable mini PC. And the software is completely free.
If cost savings are your main motivation, CacheGuard is the answer. If you want to go deeper into the privacy, data sovereignty and technical control aspects of running your own VPN infrastructure, read our dedicated article on self hosted VPN servers.
Download CacheGuard for free and have your own VPN server running at home in under 2 hours.
Questions about deploying CacheGuard? Visit the community forum at help.cacheguard.net or browse the full documentation at CacheGuard Documentation.